
I Use Photoshop To Help Me Make Design Decisions - All On My Phone
As mentioned in my post about why you should always have painter’s tape handy, I talked about how much I like to plan. I thrive with a plan, and knowing this about myself, I have found many ways to facilitate planning and make things work for the way my brain works (putting eggs in a bin is a prime example of making things work for ME as I am NOW).

“Interior design is my passion”
I also need to visualize. I can’t just think about how something is going to be, I need to see it. My dad used to tell me I was a visual learner, so if I needed to visualise something (like for a test), i should just stare at the ceiling and imagine a picture there. Now it’s the 21st century and I don’t have to stare at the ceiling - there’s an app for that.
I was planning on telling you about the Photoshop Mix App, my very favorite tool for planning out interior design choices, but just five minutes ago I found out they’ve taken it off the app store, and combined multiple apps into one app that (and this is the real bummer) you have to pay for. If you already have Photoshop Mix downloaded, you can still use it, but if you’re looking to download today, it’s now a part of Photoshop Express Photo Editor. This new app combines both the erstwhile Photoshop Mix and Photoshop Fix into an app that to use at full functionality, you need to pay either $4.99 per month or $34.99 per year.
BUT, there is some functionality available for free, and for my interior design visualization purposes, it still works fine as the free app. Here’s how I do it.
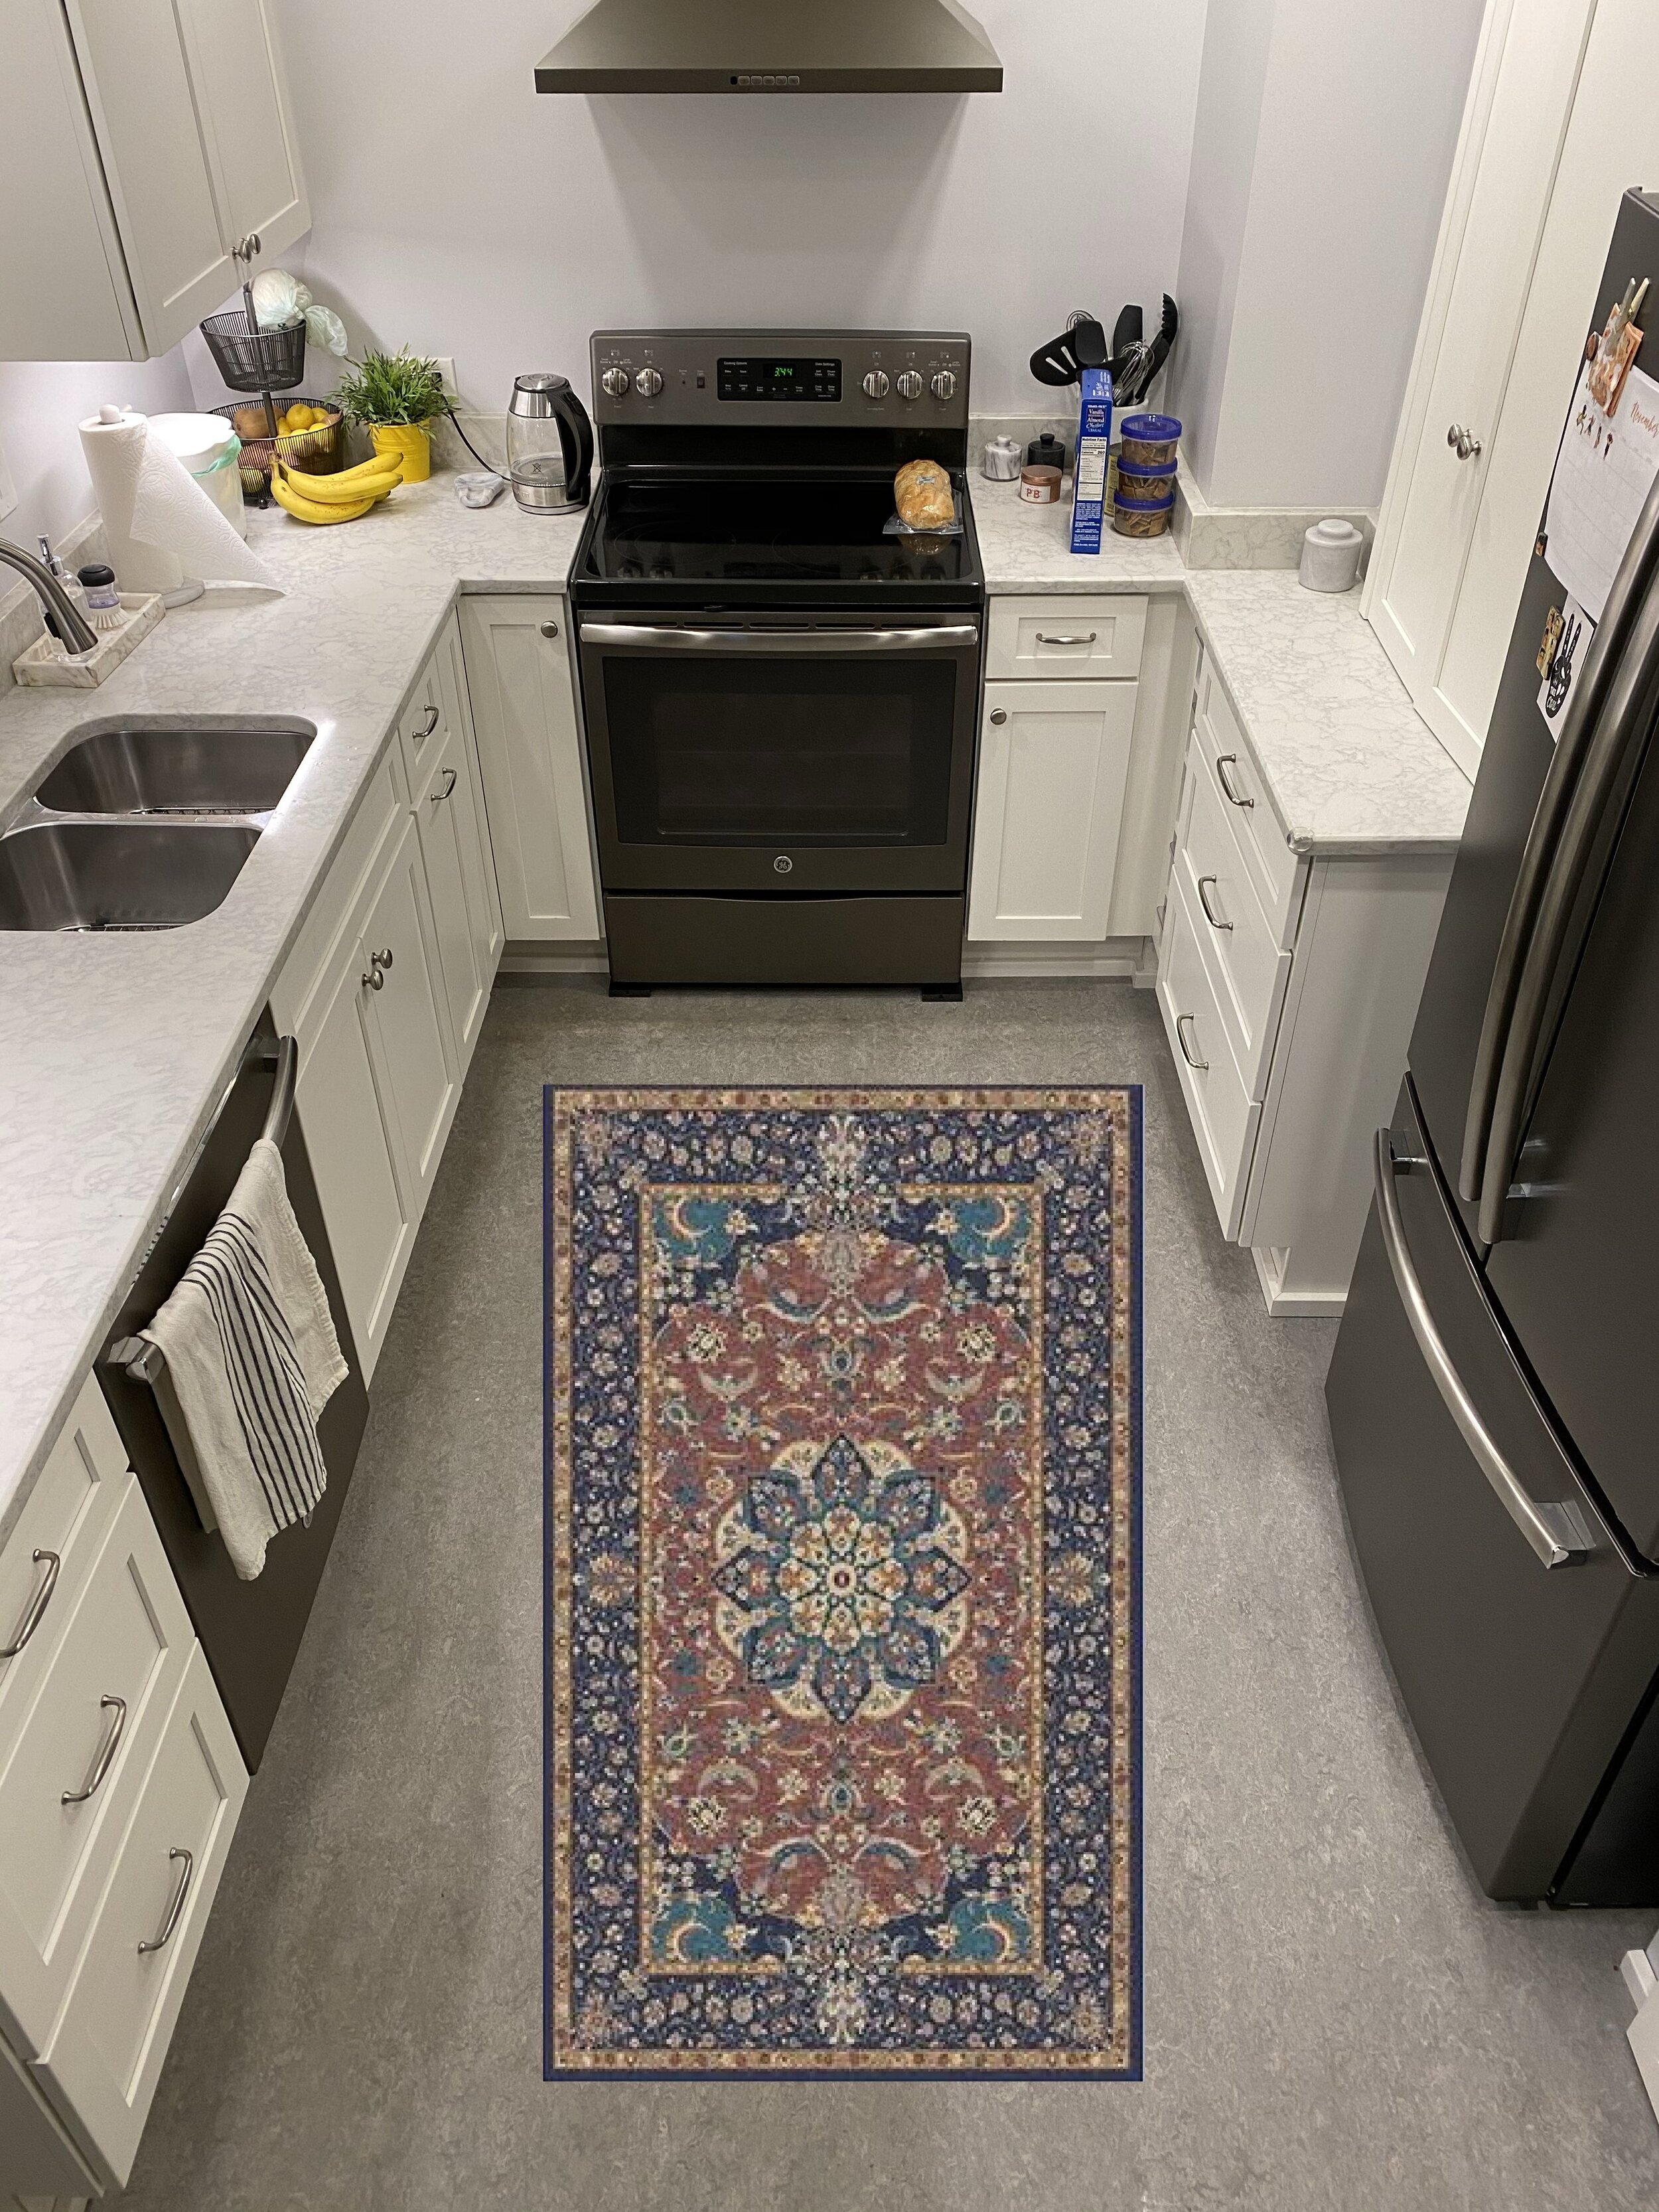
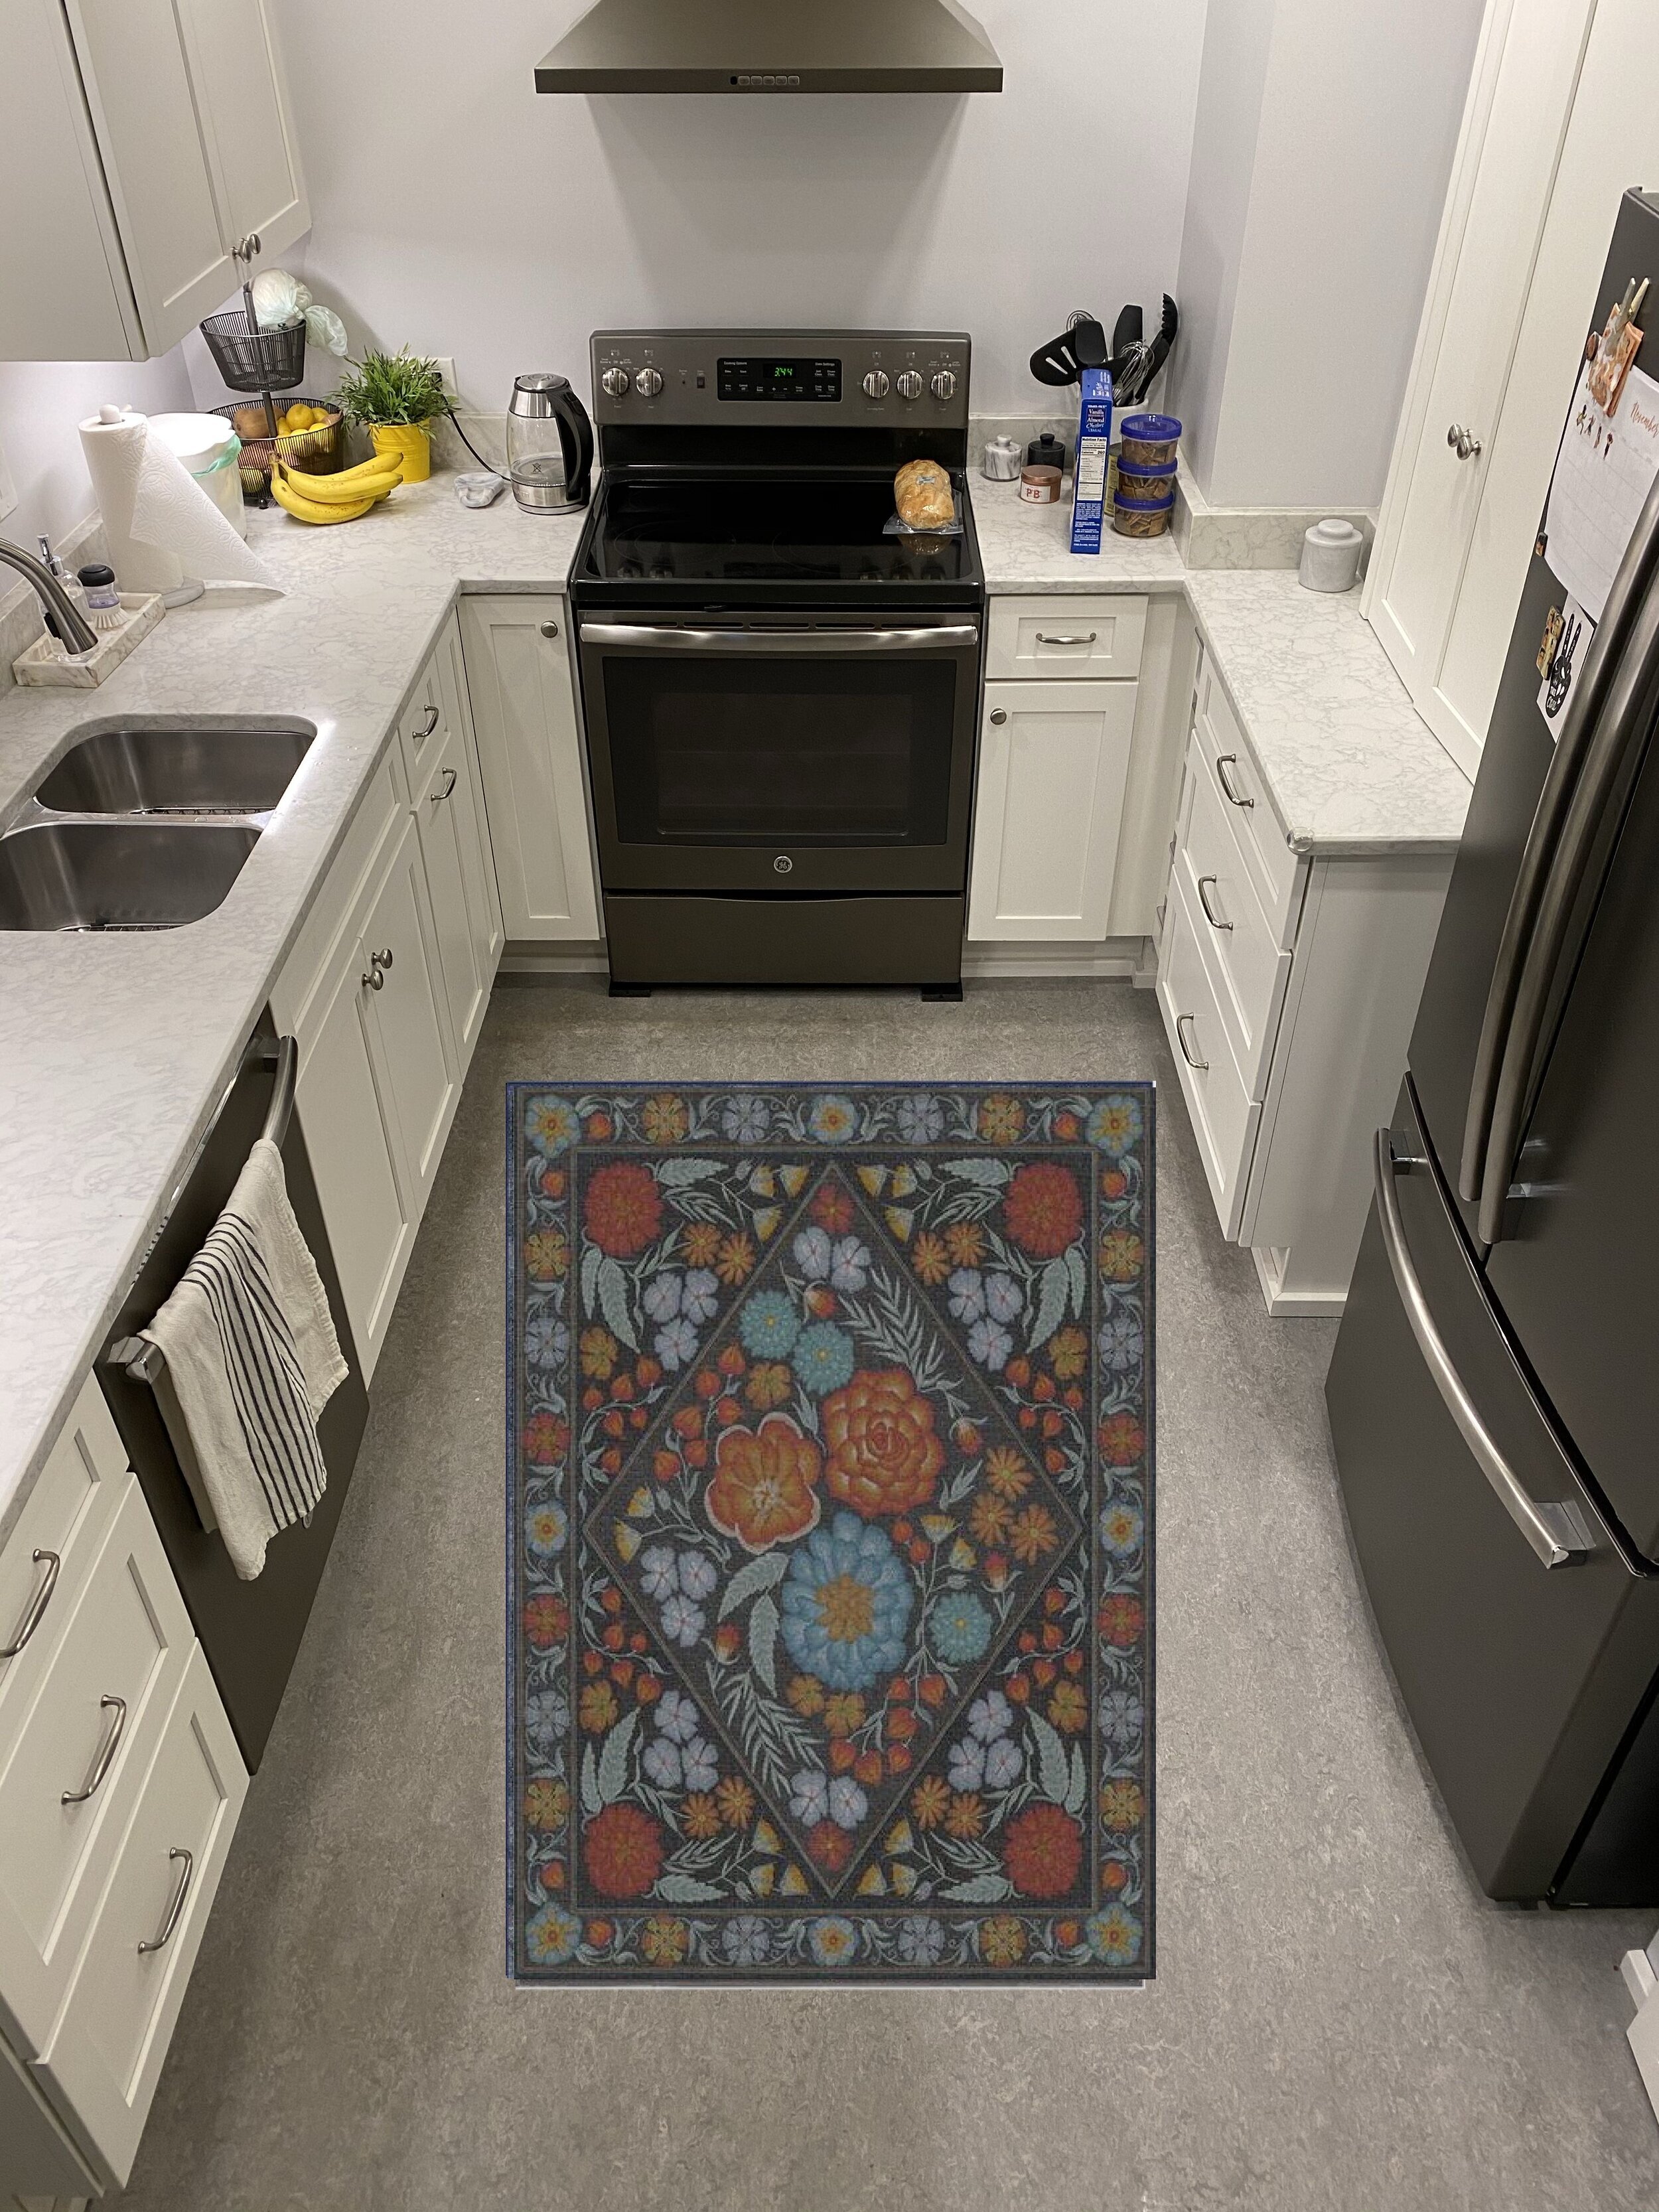
The two examples I’m going to use (that I used in real life to make design decisions) are picking a rug for my kitchen, and choosing some artwork to replace part of my living room gallery wall. Both of these are basically just utilizing layers on a photo editing app. I’m sure there are other apps that do the same thing, but considering I’m doing this on iOS devices, most photo apps are catering toward creating collages or doing extreme body modification on selfies. Plus, Photoshop Express is actually pretty intuitive.

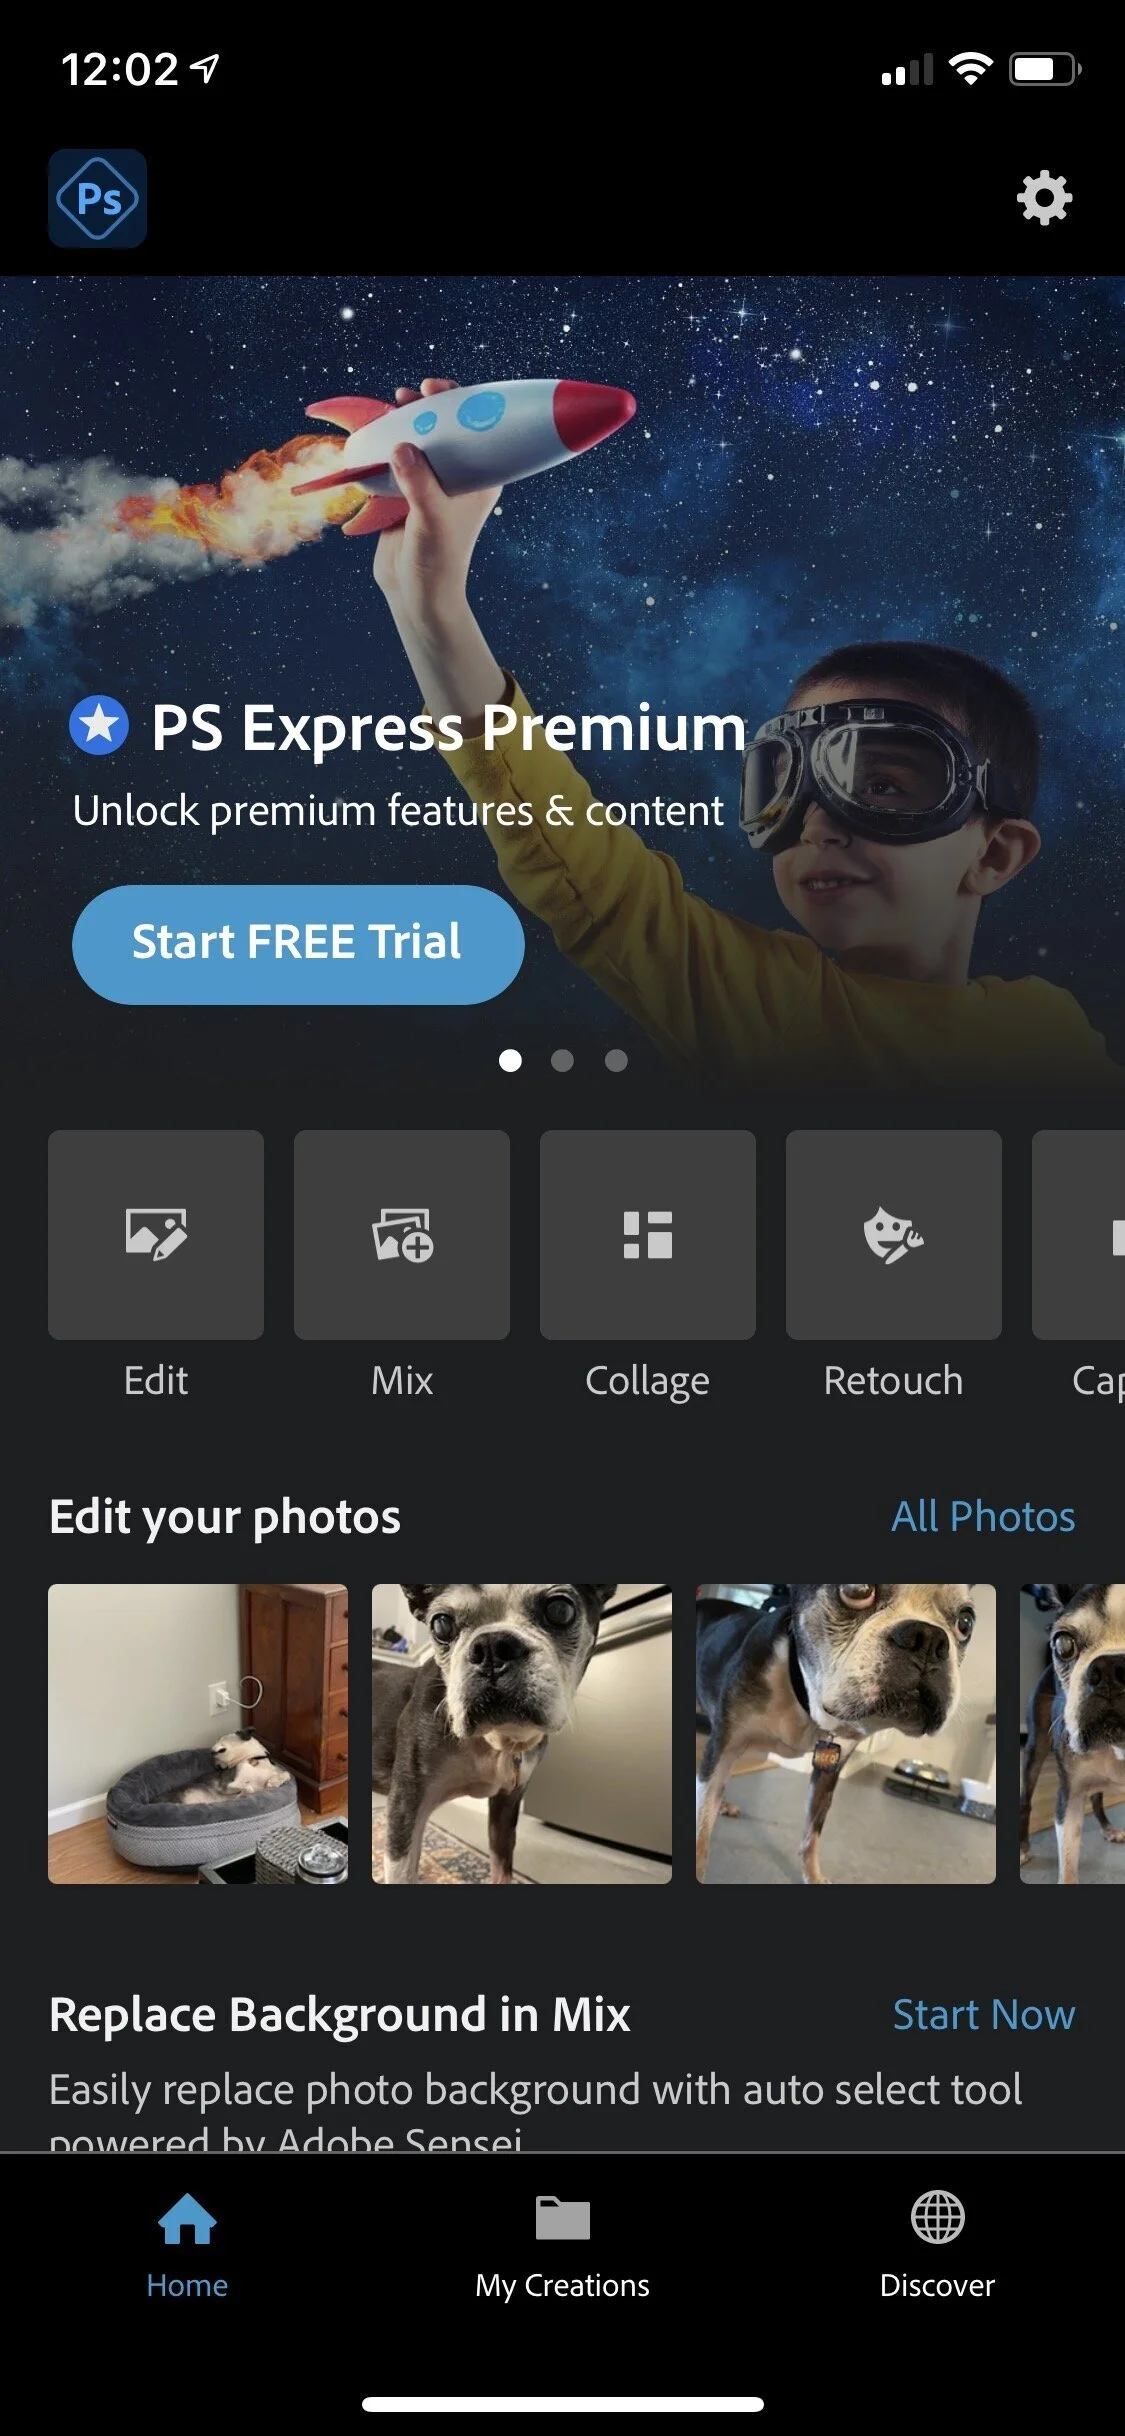
This is a screenshot from the dearly departed Photoshop Mix app, but Photoshop Express isn’t that different.
It’s so incredibly simple. You take a photo of the space you’re working on. Then grab a screenshot of the thing you are considering for that space. In the case of my kitchen, I took a bunch of screenshots of the rugs I was considering, cropped them so it was just the rug, nothing extra, and placed each rug over the photo of my kitchen. Then I could scroll through and see each of the options I was considering. The scale and angle aren’t perfect, but it helped me get a better idea of the whole picture, not just a bunch of rugs on a website. In the three years since I bought my first Ruggable rug, they went from offering like 20 designs to seemingly one million. I had a very hard time choosing, but Photoshop helped me narrow down my choices.

For my living room’s gallery wall, I took a photo of the wall as it was, found the prints I was considering to replace some old ones, and just repeated the same process. It looks a little clunky, but again, I was just trying to visualize the setup. In the case of the gallery wall, I wanted to see how the prints I was considering fit in with the prints I was keeping.

Here’s where Photoshop Express is not as good as Photoshop Mix, at least the free version. In Photoshop MIx, you could add as many layers as you wanted (I never hit a limit, at least). In Photoshop Express, the free version limits you to two. Putting a rug in a kitchen? Two layers is all you need. But arranging a gallery wall, you’re going to need more than two. In the above example, you can easily work around this by adding one piece of artwork, taking a screenshot or saving the image, then using that as your first layer and adding another to it. This is more trouble than it’s worth, and if you wanted to create an entire gallery wall or another project where you’d need many layers, I’d say just spend $5 to get the full app for a month.
If you’re using the free app on your iOS phone, you’d see this screen, then press “Mix.” Choose your base image from your camera roll, then press the + button in the lower right corner, then choose what you want to add.

Resize, put it where you want, and that’s it. It is so, so easy. If you wanted to get really involved you could mess with photo editing to make the images blend better, but I’m just trying to get a basic idea without leaving my couch.
